
Potting On Cut Flowers: Your Guide to Planting Success
Share
Introduction: Your Journey to a Thriving Cut Flower Garden
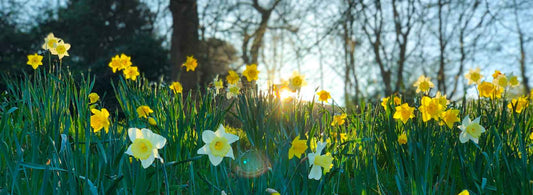
Have you ever dreamed of a garden bursting with vibrant cut flowers, ready to fill your home with colour? At Stories of Blooms, we know the joy of nurturing seedlings into stunning blooms. But the crucial steps of potting on cut flowers and planting out cut flowers can feel daunting. When do you move seedlings to bigger pots? How do you ensure they thrive outdoors? In this guide, we’ll walk you through every step with practical tips to create a flourishing cut flower garden. Whether you’re a beginner or a seasoned gardener, our expert advice—rooted in years of growing at our UK flower farm—will help you succeed. Let’s dig in and transform your garden into a blooming masterpiece!
What Does Potting On Cut Flowers Mean?
Potting on refers to transplanting seedlings from small pots or trays into larger containers to give their roots more space to grow. This step is vital for healthy development, especially for cut flowers like cosmos, zinnias, or dahlias, which need robust root systems to produce abundant blooms.
- Why it matters: Cramped roots stunt growth, reduce flower production, and weaken plants.
- When to pot on: Look for signs like roots circling the pot’s base, yellowing leaves, or seedlings outgrowing their tray (usually 4-6 weeks after sowing).
Learn more about sowing cut flower seeds to get your seedlings started right.
Step-by-Step Guide to Potting On Cut Flowers
Follow these steps to pot on your cut flower seedlings with confidence:
- Choose the right pot: Use 9cm or 1-litre pots for most cut flowers. Ensure pots have drainage holes.
- Prepare compost: Use a peat-free, multi-purpose compost mixed with perlite for drainage. Fill pots loosely, leaving 2cm at the top.
- Water seedlings: Water your seedlings an hour before transplanting to reduce root shock.
- Transplant carefully: Gently tease seedlings from their tray, holding them by leaves, not stems. Plant them at the same depth in the new pot.
- Firm and water: Press compost lightly around the roots and water gently to settle the soil.
Pro tip: Label your pots with the flower variety and date to track progress. For more on compost, check RHS’s guide to peat-free compost.
When to Plant Out Cut Flowers
Planting out cut flowers means moving your potted seedlings to their final outdoor growing spot. Timing is critical to avoid frost damage and ensure strong establishment.
- Hardy annuals (e.g., cornflowers, larkspur): Plant out in early spring (March-April) after hardening off.
- Half-hardy annuals (e.g., zinnias, cosmos): Wait until after the last frost, typically mid-to-late May in the UK.
- Perennials (e.g., dahlias): Plant out in late spring or early summer when the soil warms.
Not sure about your local frost dates? Check Met Office’s weather forecast for guidance.
How to Harden Off Seedlings Before Planting Out
Hardening off acclimatises seedlings to outdoor conditions, preventing shock. Over 7-10 days:
- Day 1-2: Place pots in a sheltered spot outdoors for 2-3 hours.
- Day 3-5: Increase to 4-6 hours, avoiding direct sun or strong winds.
- Day 6-10: Leave out all day, bringing indoors at night if frost is forecast.
Once hardened, your seedlings are ready for their garden home!
Preparing Your Garden for Planting Out
A well-prepared garden bed ensures your cut flowers thrive. Here’s how:
- Choose a sunny spot: Most cut flowers need 6+ hours of sunlight daily.
- Improve soil: Dig in organic matter like compost or well-rotted manure to boost fertility.
- Weed thoroughly: Remove weeds to reduce competition for nutrients.
- Plan spacing: Space plants according to their mature size (e.g., cosmos 30cm apart, dahlias 60cm).
Step-by-Step Guide to Planting Out Cut Flowers
Ready to plant? Follow these steps for success:
- Dig a hole: Make it slightly larger than the pot’s root ball.
- Water the plant: Water the seedling in its pot 30 minutes before planting.
- Remove from pot: Gently tap the pot to release the plant, keeping the root ball intact.
- Plant at the right depth: Position the plant so the soil level matches the pot’s surface.
- Backfill and firm: Fill the hole with soil, pressing gently to eliminate air pockets.
- Water thoroughly: Water deeply to help roots settle.
Caring for Your Cut Flowers After Planting
Post-planting care ensures your flowers flourish:
- Water regularly: Keep soil moist but not waterlogged, especially in the first few weeks.
- Mulch: Apply a 5cm layer of organic mulch to retain moisture and suppress weeds.
- Support tall varieties: Use stakes or netting for flowers like delphiniums or sunflowers.
- Feed monthly: Use a balanced liquid fertiliser to boost growth.
Want to extend your bloom season? Read our guide to extending the bloom season.
Common Mistakes to Avoid
Steer clear of these pitfalls for a thriving cut flower garden:
- Potting on too late: Delayed potting stunts growth. Check roots regularly.
- Skipping hardening off: This risks plant shock and poor establishment.
- Planting too early: Frost can kill tender seedlings. Wait for the right time.
- Overwatering: Soggy soil causes root rot. Ensure good drainage.
Why Grow Your Own Cut Flowers?
Growing cut flowers is rewarding and sustainable. You’ll enjoy:
- Fresh, seasonal blooms: Perfect for home arrangements or gifting.
- Eco-friendly gardening: Reduce your carbon footprint compared to imported flowers.
- Cost savings: Grow your own for a fraction of florist prices.
At Stories of Blooms, we’re passionate about helping you grow your own. Share your gardening journey with us—comment below with your favourite cut flowers or ask a question!
Conclusion: Start Your Cut Flower Adventure Today
Potting on and planting out cut flowers are key steps to a vibrant garden. With the right timing, tools, and care, you’ll soon be harvesting armfuls of blooms. Follow our guide, avoid common mistakes, and enjoy the process. Ready to get started? Visit our seed collection to choose your favourite cut flowers. Happy gardening!